Pay in installments of $5.62 with
 ,
,
 and
and

Shipping Estimate
USA
- USA
- CAN
- USA
- CAN
Ships within 48 hours · Estimated delivery Sep 29 - Oct 4
 Promo Codes Available:
For Your Every Summer RSVP, with Code: SUMMER15
Description
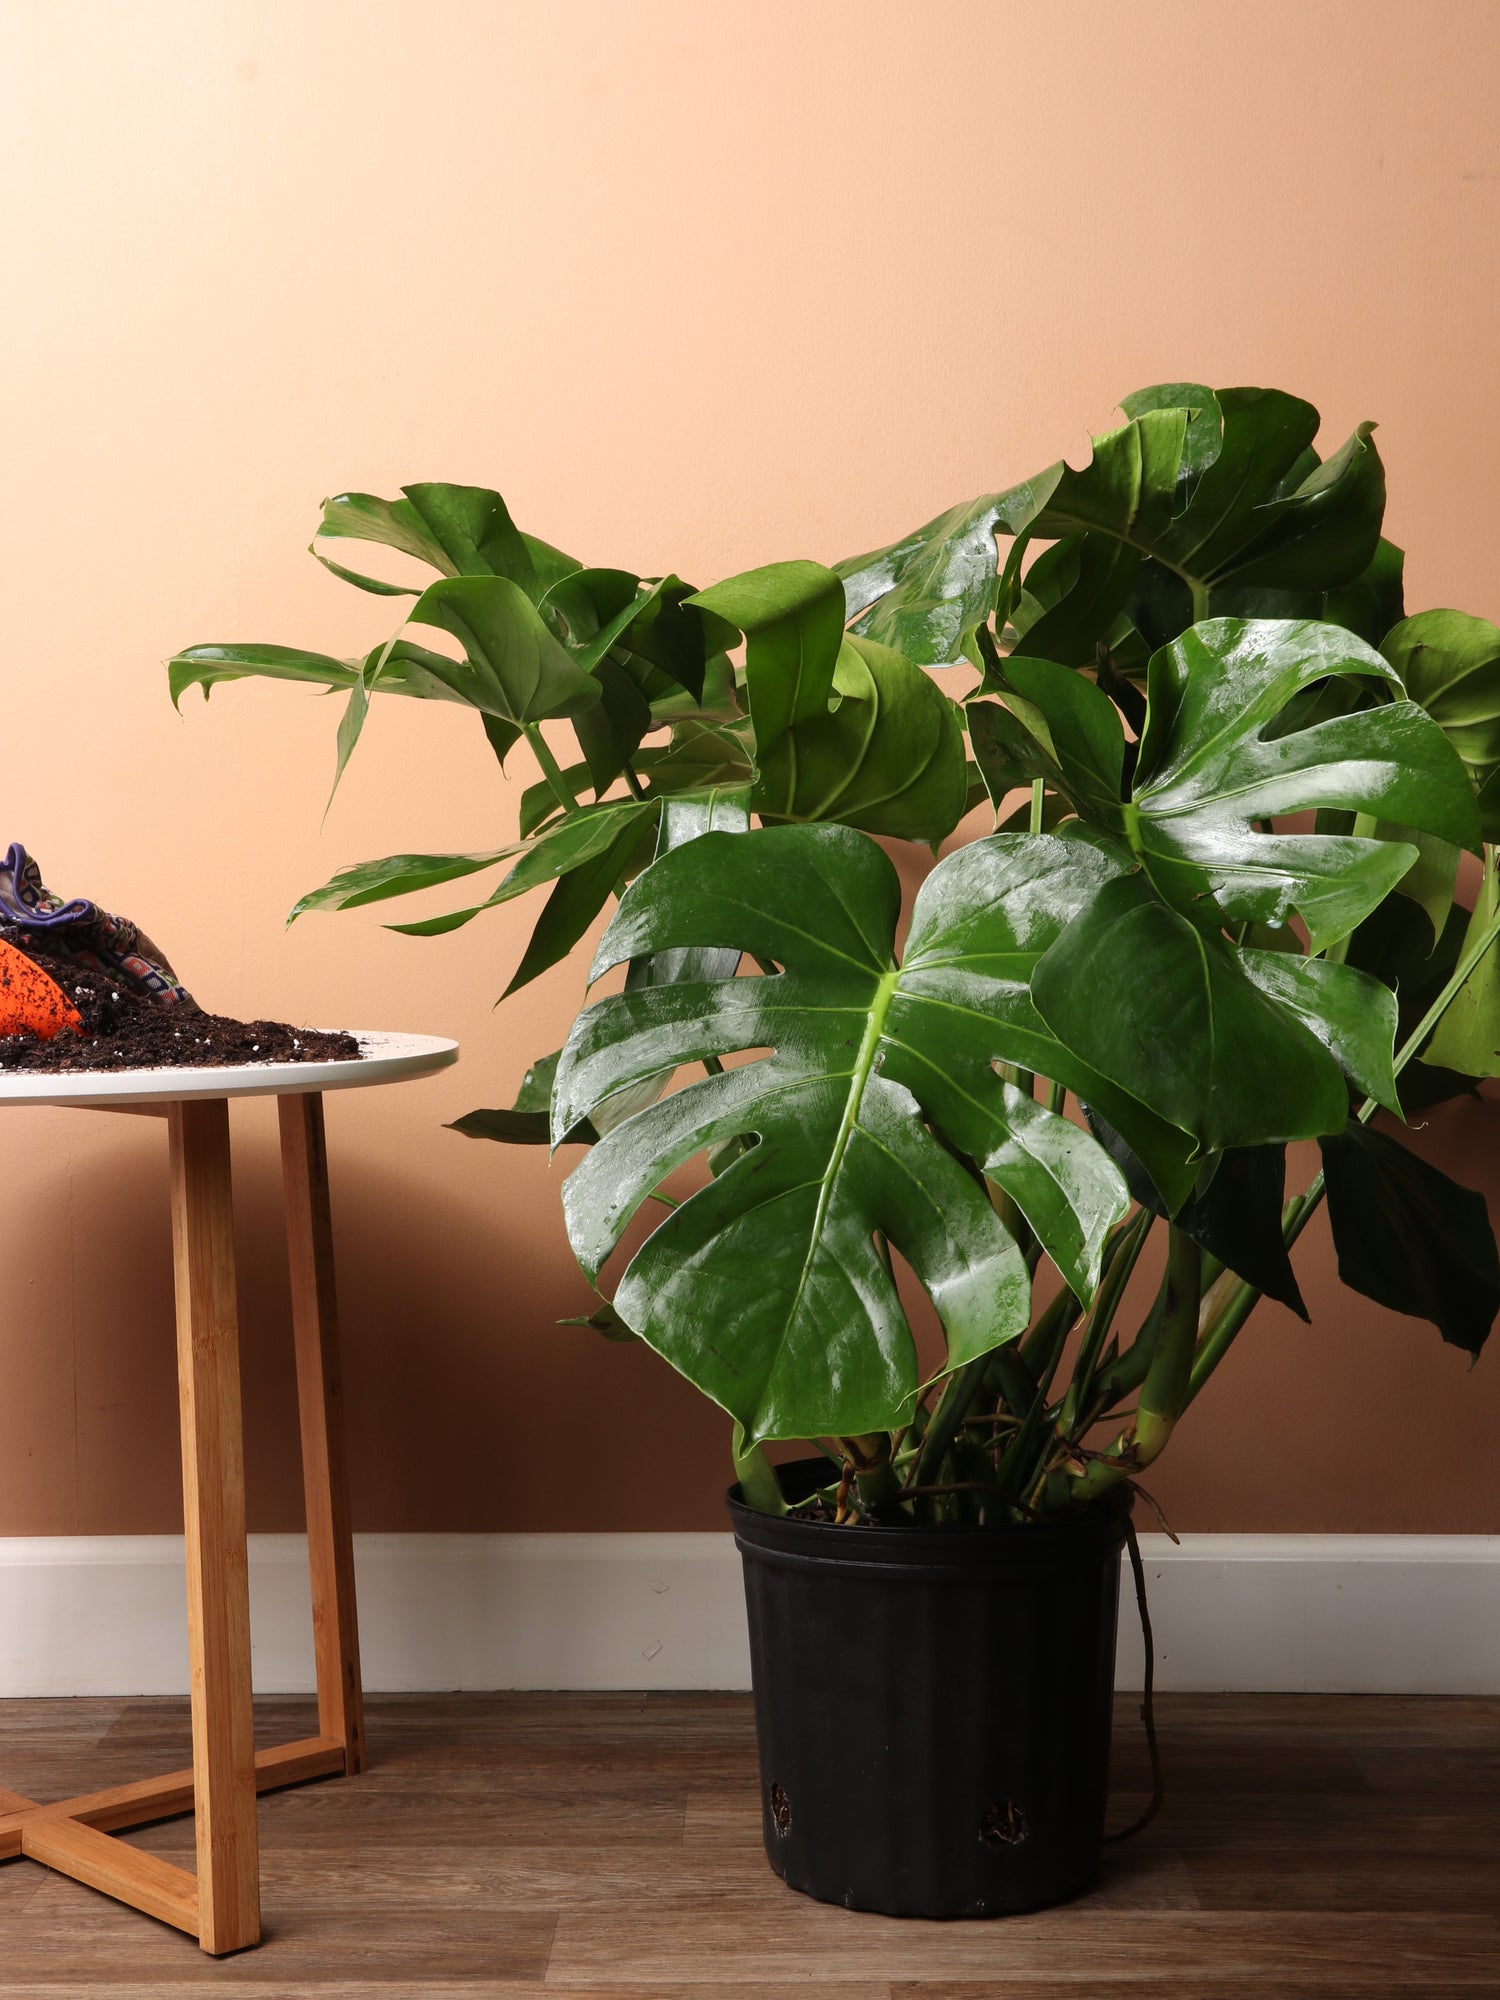
real monstera plant for sale Buy Monstera deliciosa Online | Large Indoor PlantDescription The Monstera Deliciosa has been capturing hearts for generations, and we completely understand why. This gentle giant brings such warmth and character to any space with those iconic split leaves that develop naturally as the plant matures. Originally from the rainforests of southern Mexico and Central America, she's perfectly adapted for indoor life and genuinely wants to thrive in your home. What makes her truly special are those
Description
The Monstera Deliciosa has been capturing hearts for generations, and we completely understand why. This gentle giant brings such warmth and character to any space with those iconic split leaves that develop naturally as the plant matures.
Originally from the rainforests of southern Mexico and Central America, she's perfectly adapted for indoor life and genuinely wants to thrive in your home. What makes her truly special are those beautiful fenestrations (the fancy term for the natural holes in her leaves) that aren't just stunning to look at—they actually help her survive in windy conditions by allowing air to flow through. In nature, she's a climber who uses aerial roots to scale trees while drawing nutrients from the humid air around her. While many Monstera varieties exist, this classic Monstera Deliciosa remains the most beloved for good reason.
Care
How do you care for an indoor Monstera deliciosa?
Caring for an indoor Monstera Deliciosa means providing bright indirect light near windows, weekly watering when the topsoil feels dry, and maintaining comfortable temperatures between sixty-five to eighty-five degrees Fahrenheit throughout the year for optimal healthy growth.
The beauty of Monstera plant care is that once you understand her basic needs, she's wonderfully forgiving. Place her where she can enjoy filtered sunlight—think of the dappled light filtering through a rainforest canopy. Water when the top 2-3 inches of soil feel dry to your touch, and she'll show her appreciation with new growth. A well-draining potting mix with some perlite keeps her roots comfortable, and during the growing season, a monthly feeding with balanced Monstera fertilizer helps support those magnificent leaves.
Should I mist my Monstera deliciosa?
Misting your Monstera Deliciosa helps increase humidity levels around her gorgeous leaves, which she truly appreciates since she naturally thrives in humid rainforest conditions where moisture levels stay consistently high throughout the growing seasons for healthy development.
It’s not absolutely necessary, but gentle misting makes her feel more at home, especially during dry winter months when indoor heating can reduce air moisture. Think of it as a little spa treatment for your plant friend. You can also place a humidity tray nearby or use a humidifier if you want to create that perfect environment.
How often should I water a Monstera deliciosa inside?
Water your Monstera Deliciosa inside every one to two weeks during growing season, carefully checking that the top two to three inches of soil feel completely dry before giving her another thorough drink to promote healthy growth.
The key to successful watering is paying attention to what your plant is telling you rather than following a strict schedule. In brighter locations, she'll be thirstier and may need weekly watering, while in lower light she can comfortably wait longer between drinks. We always recommend the finger test—stick your finger right into the soil to check moisture levels. This personal approach works much better than calendar-based watering and helps you build that wonderful connection with your plant.
What does a Monstera need to thrive?
A Monstera needs bright indirect light from windows, well-draining nutrient-rich soil mixtures, moderate to high humidity levels, consistent moisture without sogginess, adequate room to grow and climb upward, plus warm stable temperatures year-round for optimal health and development.
Creating the right environment is about understanding her natural habitat and bringing those conditions indoors in a gentle way. She loves having space to spread those magnificent leaves and really appreciates a moss pole or trellis to support her climbing nature.
What do Monstera deliciosa like to be potted in?
Monstera Deliciosa like being potted in well-draining organic-rich soil blends with excellent drainage capabilities, typically combining high-quality potting soil with perlite and orchid bark chunks for optimal aeration and proper drainage throughout the root system for healthy plant development.
The perfect soil mix holds just enough moisture without becoming soggy—imagine the texture of a well-made chocolate cake that's moist but not wet. Adding perlite or bark chips creates those important air pockets that keep her roots breathing comfortably. Always choose a pot with drainage holes because good drainage is one of the most loving things you can provide for your plant.
Where is the best place to put a Monstera plant?
The best place to put a Monstera plant is near large windows that provide bright indirect light throughout the day, such as living rooms, bedrooms, or home offices with east or west-facing window exposure for optimal growing conditions.
Bathrooms and kitchens with natural light are also wonderful spots because of their naturally higher humidity levels, which makes her feel right at home. Avoid placing her directly in harsh afternoon sun from south-facing windows—think gentle morning light or filtered afternoon glow instead.
Should I put my Monstera in the window?
You should place your Monstera near a window with bright filtered light rather than directly in harsh afternoon sun exposure, which can easily scorch her delicate leaves and cause permanent brown damage throughout the foliage that ruins her natural beauty.
East or west-facing windows are perfect because she can enjoy gentle morning sun without dealing with those intense afternoon rays that are too much for her rainforest sensibilities. If you only have a south-facing window, position her a few feet back or use a sheer curtain to create that perfect filtered light she craves.
Is Monstera deliciosa a good indoor plant?
Monstera deliciosa is an excellent indoor plant choice because it adapts remarkably well to home environments, tolerates various indoor conditions gracefully, purifies air effectively, and creates absolutely stunning visual impact in any space while requiring minimal daily care.
She's genuinely designed for sharing our homes—forgiving when life gets busy, adaptable to different light situations, and grows at a thoughtful pace that won't overwhelm your space. Plus, those beautiful large leaves work hard to clean your air while creating that lush, peaceful atmosphere we all crave. For plant parents who want a meaningful relationship with a plant that gives back as much as it receives, she's truly special.
Pet-friendly?
The Monstera deliciosa is not pet-friendly, as all parts contain calcium oxalate crystals that are harmful to cats, dogs, and other pets if eaten. We always recommend keeping this beautiful plant safely out of reach of curious furry family members who might be tempted to explore with their mouths.
Is Monstera deliciosa toxic to dogs?
Monstera deliciosa is toxic to dogs because calcium oxalate crystals throughout the plant cause oral irritation, excessive drooling, vomiting, and difficulty swallowing if any of the parts are ingested, meaning you’ll need immediate veterinary attention for safety.
Is Monstera deliciosa toxic to cats?
Monstera Deliciosa is toxic to cats. It contains calcium oxalate crystals that can cause immediate mouth irritation, excessive drooling, vomiting, and potentially even more severe symptoms if large amounts of it are consumed by your curious felines.
Factoids
Is Monstera deliciosa toxic to touch?
Monstera deliciosa sap can cause mild skin irritation or rashes in sensitive individuals due to calcium oxalate crystals in plant tissues, but it's generally safe to touch during normal handling and care. Always wash your hands after pruning or repotting.
Is it safe to have a Monstera in your bedroom?
Having a Monstera in your bedroom is completely safe for most people, provided pets and children can’t get access the plant. It also offers excellent air-purifying benefits, giving you better sleep quality while creating a beautiful ambience.
She actually makes a wonderful bedroom companion—those magnificent leaves work quietly through the night to filter toxins from your air while you rest. Just ensure she gets adequate light near a window and that curious pets or little ones can't reach her. Many of our customers find having plants in their sleep space creates a calming, nurturing environment that helps them unwind at the end of each day.
Are Monstera deliciosa air purifiers?
Monstera deliciosa is an effective air purifier that helps filter harmful toxins and improve indoor air quality. They’re popular choices for homes and offices where you need natural air purification solutions that also provide stunning visual appeal.
Those impressive leaves aren't just for show—they're working steadily to clean your air throughout the day and night. She's particularly good at removing formaldehyde and other common indoor pollutants that can accumulate in our homes. While she won't replace a mechanical air purifier, she definitely contributes to a healthier indoor environment while looking absolutely beautiful doing it. It's like having a living air filter that also brings joy to your daily routine.
What is the origin of the name Monstera deliciosa?
The name Monstera deliciosa is made up of the Latin words meaning "monstrous", referring to the dramatic split leaves with striking fenestrations, and "delicious", specifically referencing the plant's edible fruit when it reaches full ripeness in natural habitats.
It's a name that perfectly captures both her dramatic visual impact and her hidden culinary talents.
Is Monstera deliciosa known by any other names?
The Monstera deliciosa is known by many names, including Swiss cheese plant, split-leaf philodendron, fruit salad plant, delicious monster, ceriman, windowleaf, Mexican breadfruit, and Penglai banana, with names varying by different geographic regions and plant communities worldwide.
The "Swiss cheese plant" nickname is probably the most popular because of those distinctive holes that look like nature's own artwork. "Split-leaf philodendron" stuck even though she's not technically a philodendron—sometimes plant names take on a life of their own!
Why does Monstera deliciosa have holes in its leaves?
Those distinctive holes are brilliant evolutionary adaptations that prevent wind damage by allowing air to flow through the leaves in her native rainforest environment, while also helping rainwater reach the forest floor to support the entire ecosystem around her.
Can you eat Monstera deliciosa fruit?
You can eat Monstera Deliciosa fruit only when it reaches full ripeness, as it tastes like a delightful blend of pineapple and banana, but unripe fruit contains irritating calcium oxalate crystals that cause mouth discomfort and should be avoided completely.
Buy a Monstera deliciosa
Your home is ready for this beloved classic that has been bringing joy to plant families for generations. This Monstera deliciosa offers you the chance to nurture a living piece of art that grows more beautiful with time, developing those iconic split leaves that make every space feel more alive and welcoming.
Through our live video shopping calls, you can meet your exact plant before she arrives—we believe in making sure you feel completely confident about welcoming her into your home. Point to the one that speaks to your heart, and we'll ensure that special plant arrives looking just as healthy and beautiful as when you first fell in love. Because choosing the right plant is the beginning of a wonderful, long-term relationship.
Shipping Notes
- Free Standard Shipping on $100+ Orders to the USA.
- Except Preorder products are shipped in 48 hours.
- Delivery to the USA:
- Standard Shipping : 3-10 business days
- If time is of the essence, please consider selecting expedited delivery for faster service.
Exchange/Return Notes
- We offer a 30-day return/exchange service after receiving.
- Final sale items are not eligible for returns or exchanges.
- To process your return/exchange, please contact us at [email protected]
- Please click here for more details>>> Return & Exchange Policy